Part 1

Of all the comments made about my classical guitars perhaps the commonest seems to have been -“Ease of playability”.
From my first thoughts on guitars I realised that a perfectly flat fingerboard had its problems. The guitars I looked at seemed to be flat. I read a book on construction that said it should be flat, but, knowing that steel string guitars clearly were not flat, I found myself building shapes in my head and wondering. To get to a fuller understanding of optimum playability we need to understand more about the behaviour of the components. The most important component in a stringed instrument is the string. It stores energy and releases most of it to one end- attached to the soundbox. Like most, if not all, forms of energy it is a waveform. A string, deflected from its ‘at rest but under tension’ line forms a parabolic curve (a wave) which decays and decreases back to the rest position as its energy is transferred to the bridge saddle. You can observe this for yourself on the bass string in natural light. (Never carry out critical observations of spinning or oscillating parts by artificial light or in recorded formats.)
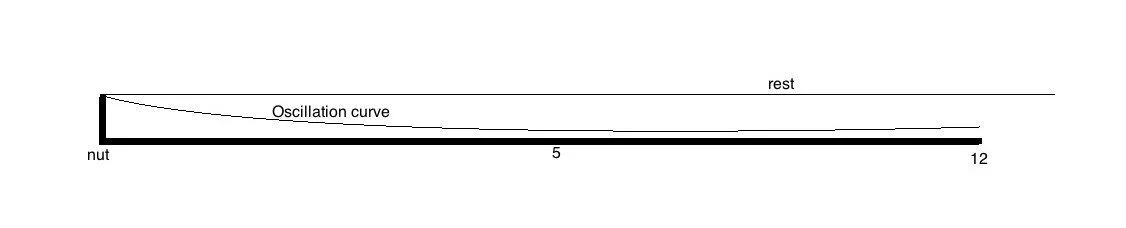
Now we observe that if a string touches anything along its length its tone will suffer, possibly to the severity of a buzz. Apart from your fingers, insufficiently carefully placed, this is most likely the top of a fret. Now ease of playing considerations mean that we usually run the strings as near to the fingerboard and its fret tops as we can. How near is that? The “Action” of each guitar string is measured as the airspace between the string at rest and the top of fret 12 - (The octave) {half distance}. Decisions on this ideal action distance are not an exact science. But an important point to note is that, on a flat fingerboard, due to the shape of the parabolic curve a string describes in its oscillation it will almost certainly not buzz on fret 12 but on frets 5 +/or 6. Fret 5 is at 1/4 the length of the string.
Each string is of a different weight per unit length. Bass strings are heavier. They oscillate more slowly than treble strings and have time to travel back and forth a greater distance from the ‘at rest’ line. The bass E travels back and forth half as many times as the fourth string fretted at fret 2 (note E assuming standard tuning). The treble E string is lighter and tensioned to the point where it is oscillating four times for every one the bass E does. Each travels less distance from its ‘at rest’ line than the Bass E
It follows that the “action” of each string can be decreased as we go across the fingerboard from Bass E (max) to Treble E. On a flat fingerboard this suggests that the saddle will be much higher for Bass E. Saddle height affects the tone of a string and excess height gives a tone some have described as “Banjoey”. This may not be the bass sound we want.
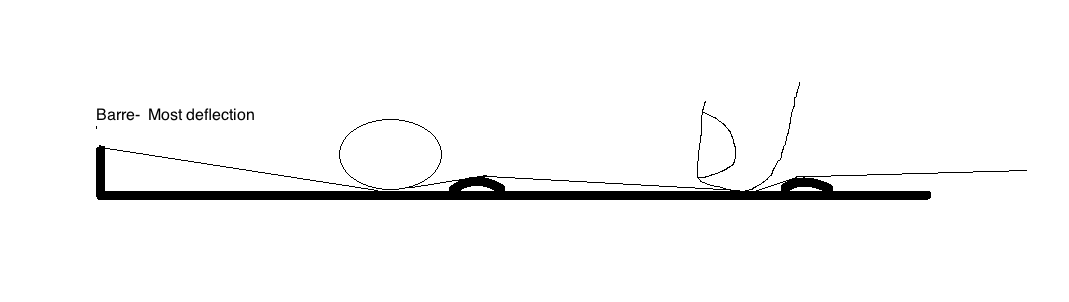
Another thing to understand about strings which starts to bring in frets and fingers is that our fretting fingers increase the tension in the string. If we pull a string down to a fret before playing it we increase its length and therefore its tension. If we were to pull a string down behind a fret with one finger e.g. left index and then fret it again one or two frets further down this increases the effect. That is what we do with barre chords. How hard you press affects this by increasing the length of string flattened onto the fingerboards wooden surface.
The frets themselves vary by height. Smaller lower frets decrease some of the tension increase effects but are more demanding of ‘clean’ technique - accurate placing of each finger close behind the fret. Our fingers are the things we have least ability to change in their nature. But there is much we can do to the fingerboard and the frets and the saddle to make life easier for ourselves and improve tone and playability.
So part 2 will look at the tools we use and the finer points of the shapes we seek to make with them to produce an ergonomically effective and musically successful instrument.
Part 2

In part 1, I looked at the curve the bass string describes when vibrating. The 5th and 6th frets ‘get in the way’. So we could lower frets 5 and 6 and get clean sound with a lower action at fret 12. This departs “flat” and suggests a lengthways concavity under string 6. Does this apply to string 5? - Yes - but less so as it doesn’t move from ‘rest’ line as much. And so on for string 4 but effectively this idea of concavity - called “Bass Relief “ can be zero under strings 1 and 2.
If we remove fingerboard timber to create this curve we could continue to lower fret 12 and thus achieve optimum ‘action’ with a more nearly level height saddle. So let us imagine a fingerboard with its thickest part at the nut end of Bass E and its thinnest under bass E fret 12. Under Treble e the timber is flat and approx. equal thickness. The top surface when shaped to my specification looks twisted and the ‘bass relief’ curve is apparent down the bass side.
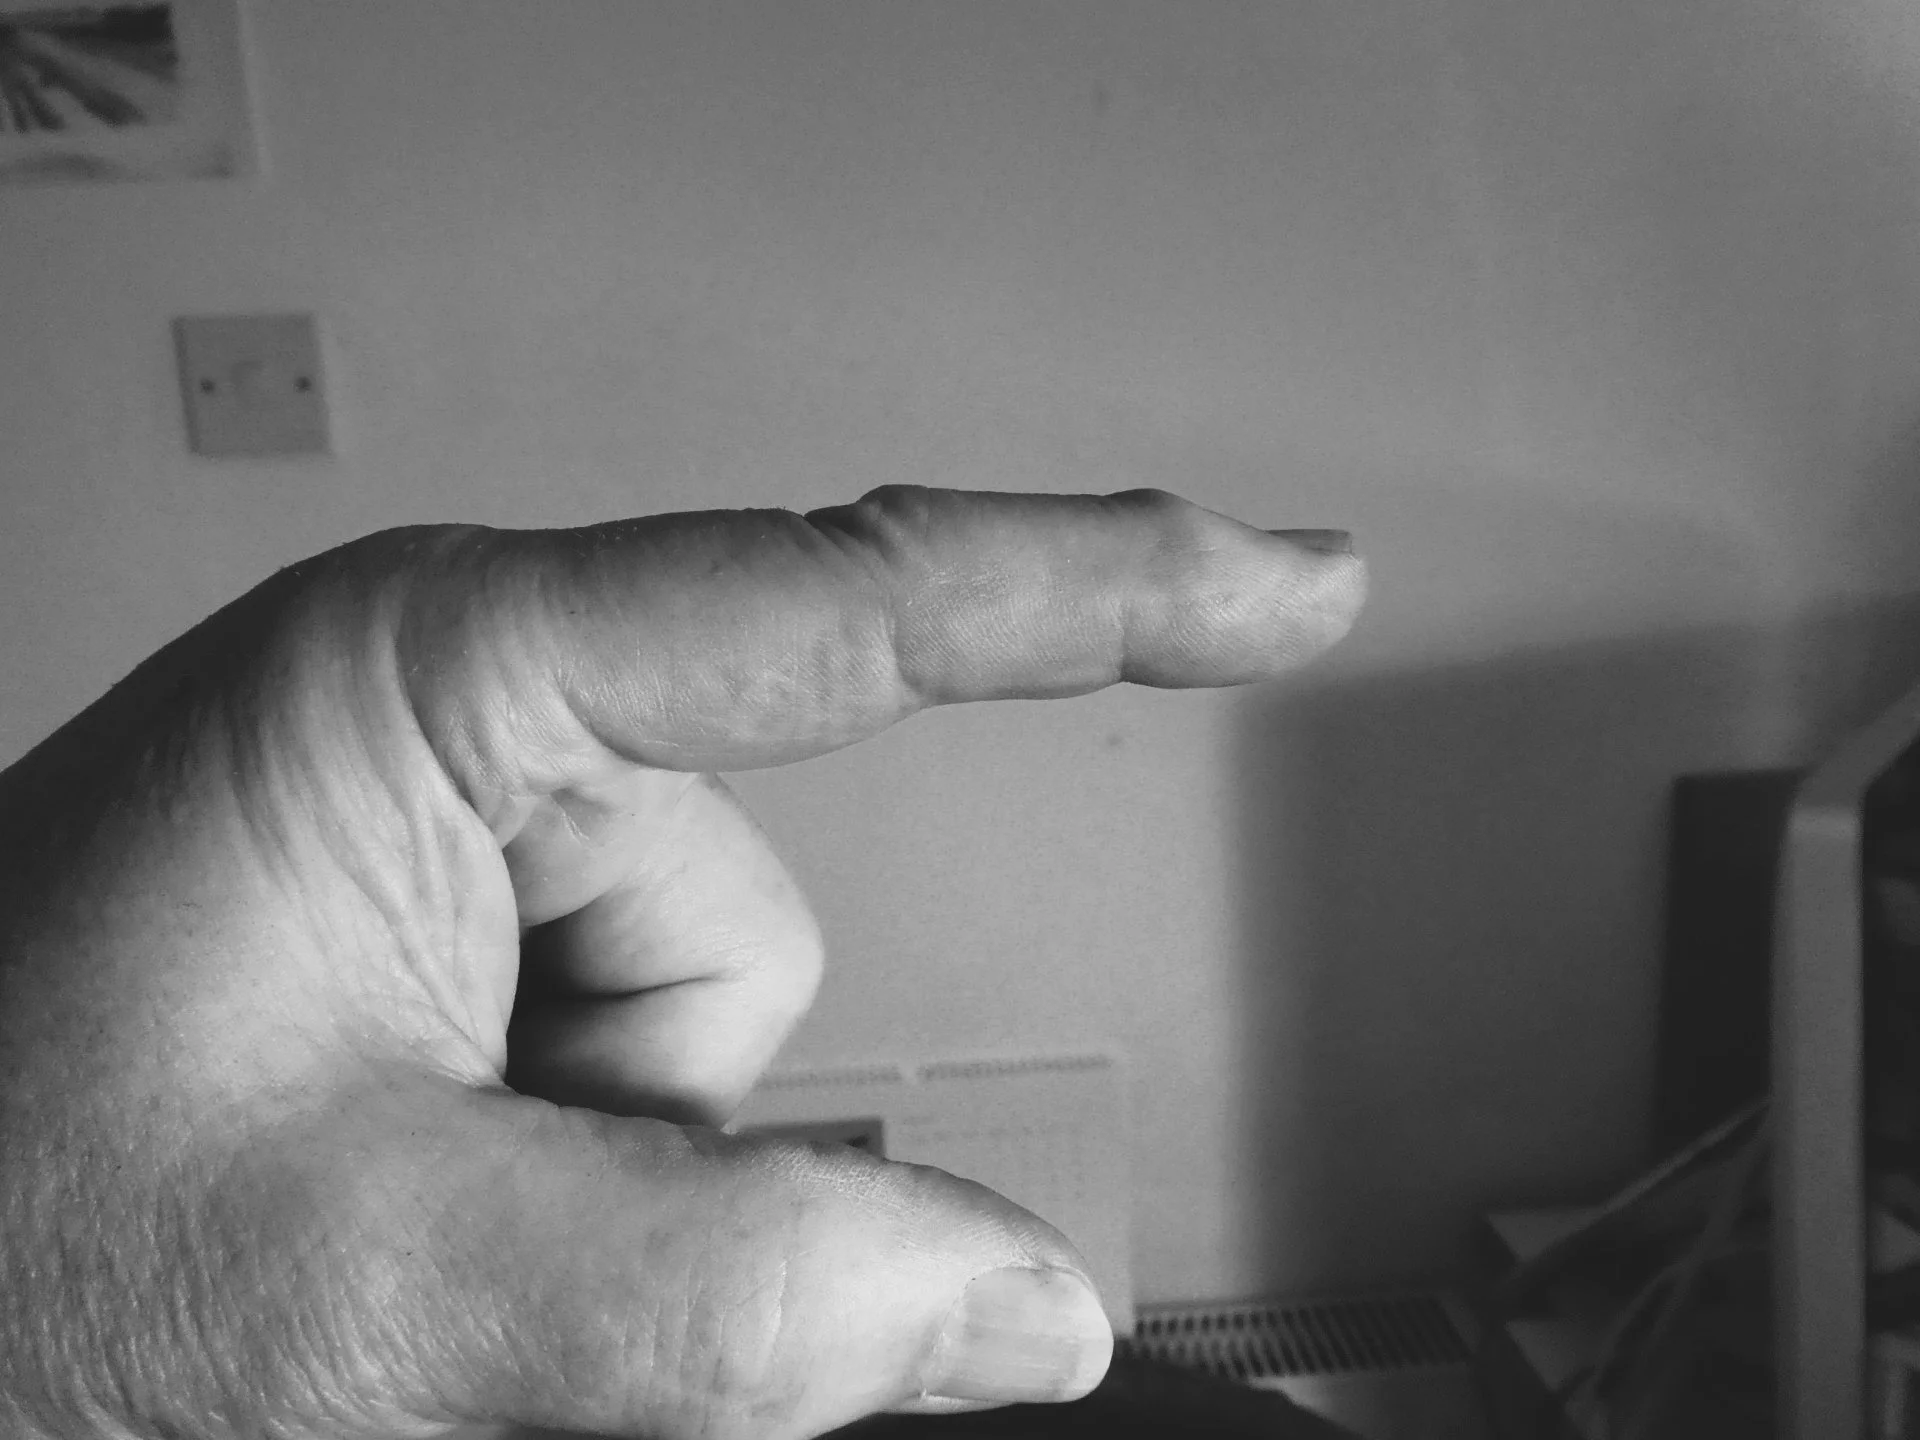
This assumes a fretboard flat across. I never liked this idea. If you play a “Barre” with your index finger it is easier to hold down the strings cleanly if there is a positive curvature across the fretboard as well. The positive curvature can be the same amount all the way. There are factory made tools that give you a concave sanding surface to help keep it identical over the whole length but they’re made for steel string makers and are generally too curved. In any case I favoured not making it an identical radius curve. I found it best to ease the curve nearer the body. What I did was to keep the height of the middle above the edges to the same amount so that the curvature eased slightly as the fingerboard widens. I usually made it about 1mm or a little less.
I always glued the fingerboard on the otherwise near complete guitar before planing these shapes. I didn’t trust a finely shaped surface not to distort somewhere under clamping down. I planed fingerboards with a small wooden plane and a steel no 5 and several handmade gauges including a couple of straightedges. Starting at about 7mm thick I planed with the head in a suitable vice (home made) and a guard over the top of the body. I kept in my head the whole surface topography with cross curvature and concavity along the bass side; maximum removal at fr.12 bass side; least at the bass nut; even removal along the treble side.
Starting on a flat planed fingerboard glued down and thoroughly dried out, I would start with the small plane and work from nut to body. This was with a ply upper bout guard fixed. Concentrate on removing timber to create the concavity in your mind’s eye. Check regularly with a fingerboard length straight edge. Of course you are trying to remove most under the path of string 6 and decreasing across 5 and 4 so that you have essentially removed nothing from treble half of the fingerboard. Then take the no 5 and evenly remove timber along the treble edge and move across to the middle keeping the positive cross-curvature in mind. Now the best tool to match up the two sides, planed rather differently, is a cabinet scraper - rather like a steel playing card. This can blend together the differently planed sides and refine the curvature. It encourages the cross-curvature as it follows this curve when held properly under tension by your hands. Use a straight edge regularly to check for any points of lengthways convexity (must be zero or negative everywhere).
I used several straight edge pieces and a cross curvature guide which, like the small wooden plane, I made myself, as I did the head vice and the body guard.